Archive for the ‘Natural Hair Styles’ Category
CurlFormers Review
I decided to do a set of curlformers. What a Task!!!! It took me 3.5 hours from wash to set. I used over 50 curlformers and I still came up short. I improvised by making a few of the curls have more hair. Your supposed to keep it small so you can get closer to the root. Sleeping was another issue. I decided to let them air dry because I despise sitting under the dryer. This meant I had to sleep in them. Never again!!! Next time I’ll do them in the morning and let them sit all day or I will just sit under the stupid dryer.
Anyway, I am not quite sure there will be a next time. I did the set because others have said that it stretched their hair out and caused less knots. My results were OK, but they look pretty similar to my normal twist out done on medium size twists and stretched with bands (actually I think I like the twist out better). This takes me all of 1 hour from wash to set and is much easier to sleep on.
I will give it a few days though. The one thing I do like that is different from the twists out is that my hair is pretty straight. If this falls and gives me a way to do mini twists or straighten with my flat iron without having to blow-dry my hair, then I will call it a success. Se below for the pics!
- Twistout (not banded)
- Curlformers
- Twistout Banded (Day 3)
Braided Bun
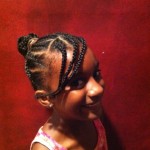
So I am always looking for new styles for Kaycie that will last a week or longer and take a short amount of time to do. I hate doing hair daily because I love my sleep in the morning 🙂 I am not great with cornrows because I am horrible at parting and I am slow beyond belief. Despite these shortcomings, I decided to try the braided bun. It came out ok and it took me about 1.5 hours to complete. Hopefully it lasts the week.
Things Learned:
- Part beginning at the top and proceed around clockwise.
- Determine the middle if the head ahead of time. All braids should be done towards the middle. It may be helpful to part ear to ear to begin with.
- Stick with whatever spot you chose as the middle. Don’t try to braid hair in the middle of the bun if you happen to choose the wrong spot. It doesn’t look better than just braiding to the wrong spot.
|
|
Protective Style #2
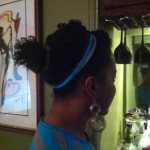
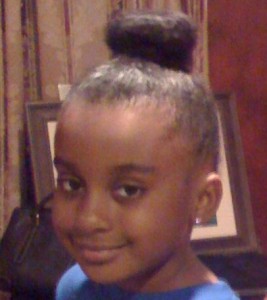
So I decided to go with the messy bun this week. It didn’t work out so well. Although I felt quite fine today, I constantly received questions about whether or not I was sick or comments saying I looked tired. Being that the only thing that changed was my hairstyle, I am choking this up as a loss. Being that I am practicing full hair disclosure, I am still posting the pics. I am still thinking about what will happen tomorrow. Maybe I can do something to jazz this up some.
List of Protective Styles
Here is a list of great protective styles. I found it on LHCF and thought it would be great to share as I am taking on this challenge!
SLEEK & SIMPLE (for long hair, some for short/med hair):
– Bun
– Bun w/ Chopsticks
– Bunned pigtails
– Chignon (http://z.about.com/d/beauty/1/0/f/E/chignon7.JPG)
– French Roll/Twist
– Braided Coil Updo (http://www.hairstylescut.com/articles/holiday-updo.htm – scroll to Beyonce)
– Roller/Flexirod/Curlformer set & Clip up the hair
– Flamenco (http://www.longlocks.com/flamenco.gif, http://www.longlocks.com/hairstyles.htm)
– Elegant Gibson (http://www.longlocks.com/elegantgibson.gif,http://www.longlocks.com/hairstyles.htm)
SINGLE-TWISTING IT:
– Bantu Knots (http://images.inmagine.com/168nwm/rubberball/rbv013/rbv0130053.jpg)
– Finger / Comb Coils (for short natural hair)(http://www.naani.com/contents/media/dreamypisces029.jpg,http://www.naani.com/models/photos/a0/98/66/a098662b826cd94.jpeg)
DOUBLE-TWISTING IT:
– Twisted Ponytail
– Twisted Ponytail into Bun
– Chunky Twists
– Tiny Twists
– Flat Twists (http://www.aolcdn.com/aolnews_photos/0d/07/20050426160009990011,http://i50.photobucket.com/albums/f323/phillyflower/DSC01452.jpg)
– Senegalese Twists (http://www.braidsinc.com/gallery/senegalese1.JPG)
– Kinky Twists
– Spring Twists
– Gypsy Twists (scroll down: http://www.khamitkinks.com/twists_locs.html)
– Baby Curl Twists (scroll down: http://www.khamitkinks.com/twists_locs.html)
– Loc Extensions (http://i222.photobucket.com/albums/dd85/mushiyasmith/0150-921-davadreadupdo.jpg)
BRAIDING IT:
– Single Braided Ponytail
– Single Braided Ponytail into Bun
– Double Braided Bun (http://www.longlocks.com/hairstyles.htm)
– Box Braids (w/ real hair)
– Box Braids (w/ extensions)
– Individual Braids (extensions)
– Micros (not too tight though)
– Cornrows (w/ real hair)
– Cornrows (w/ extensions)
– Plaits
– One French Braid
– Two French Braids
– French Tuck (http://www.longlocks.com/hairstyles.htm)
– English/Dutch Braids (http://www.longlocks.com/how-to-braid-hair.htm,http://www.dreamweaverbraiding.com/Braiding_Tips.htm)
– French/English/Dutch Braid(s) (w/ extensions)
– Victorian (http://www.longlocks.com/hairstyles.htm)
– Edwardian Braid (http://www.longlocks.com/hairstyles.htm)
– More braided styles: http://www.dreamweaverbraiding.com/Braiding_Tips.htm
MIX N MATCH:
– Cornrows in front; Twists in back
– Cornrows in front; Box Braids in back
– Cornrows in front; Bun in back
– Flat Twists in front; Twists in back
– Flat Twists in front; Box Braids in back
– Flat Twists in front; Bun in back
– Bantu Knots in front; Twists in back
– Bantu Knots in front; Box Braids in back
– Bantu Knots in front; Bun back
– Braids into Bantu Knots (http://www.worldofbraids.com/upload/page_files/58.jpg)
– Twists into Bantu Knots
COVER IT UP:
– Cornrows under Wig
– Weave / Sew-in
– Micros / Sew-in Combo
– Lace Front / Lace Wig
– Phony pony
– Phony puff
– Cornrows under HeadWrap (http://cornrows.co.uk/patterns/wrap01d.jpg)
– Bun under HeadWrap
Protective Style #1a
So towards the end of the week I did begin to have that overwhelming urge to wear my hair out. I was really missing my curls which have been housed up in this bun for days now. I am truly dedicated to this challenge so I decided to find a compromise. The answer I found was BANGS!!! My hair is too long for real bangs and I refuse to cut, so I decided to part the very front of my hair, wet and moisturize with oil, and braid it into two small braids. I took this out in the morning for a nice wavy curl and set them to the side for side bangs. This partially satisfied me. However, the curls came out so nice I continue to wonder what would happen if I did my entire head. There will be time for that after this challenge 🙂
Protective Style #1
 |
 |
A straight phony pony is what I decided to use for my first week of protective styling. This is a Milky Way drawstring ponytail that I purchased from the beauty supply store for $9.99. It can be used on long or medium length hair. As long as you can pull your hair into a ponytail, this will work. I washed and conditioned my hair and used Eco Styler Gel to create a high ponytail with my hair. I tied my hair down with a silk wrap in order to get the hair to lay as flat as possible. In the morning, I placed the ponytail over my own ponytail and pulled the drawstring. I continue to add a small amount of gel and wrap with a silk wrap each evening before bed.
Today is my day to wet my hair and place the ponytail again. I am trying to moisturize every 2-3 days. Avocado oil is on deck as my sealer this week. Aussie Conditioner will be used as my co-wash. No shampoo needed since I am only shampooing once a week.
I haven’t been drinking as much water, so I will try harder to get that in the remainder of this week. So far, I miss my hair, but I haven’t experienced any overwhelming urge to wear it out.
Mini Two-Strand Twists
Mini Two Strand Twist is my ultimate protective style. I love this style. It takes me a while to do, but it lasts for up to 4 weeks! I don’t need to do anything to my hair during that time. It’s truly a shake and go style. I co-wash my hair about once a week and I spritz with a conditioner (V05 Moisture Milk or Suave Naturals), water, jojoba oil mix daily for moisture.
How to Create the Style
- I chose to blow dry my hair prior to starting. After washing my hair, I braid in four braids and let them air dry. Once dry, I use a heat protectant and I blow dry on low. This is not a required step. The style looks just as nice and lasts just as long if you don’t blow dry. I choose to blow dry in order to show the length.
- Use a rat tail comb and not worrying about parts, make sure you are taking just a small amount of hair at a time.
- Split the hair in to two sections and twist one section over the other. Keep doing this and twist the hair all the way down to the end. The twist should be a little smaller than the size of a straw when finished.
- I like to work with the front first. I twist starting at the hair line. I twist going towards the front. If you like a part in your hair, this is the best time to create it. Make sure you twist the entire front including the sides.
- Once I get to the middle of the head, I switch gears and begin working the very back. This means I end up with a big chunk in the middle that is undone. I like it this way because, if for some reason I can’t finish, I can always put the hair in a bun and it looks as though my entire head is done.
- I then work on the middle part. Twisting those to the back.
- Flip the front of the hair back when done and the style is complete.
- To get the ends to curl, I use my water, conditioner, jojoba oil spritz on the very ends and scrunch with my hands. Scrunching is done by cupping the ends of the hair and squeezing similar to an accordion.
How to Manage the Style
- Add a small amount of jojoba oil to the hair at night.
- Tie down the hair with a satin scarf or sleep on a satin pillow.
- In the morning spritz the hair with the water, conditioner, jojoba oil mix. Scrunch the ends.
- Co-wash weekly. I use V05 Moisture Milk or Suave Naturals for my co-wash.
How to Remove the Twists
- Start out by unraveling as many twists as you can by hand. Don’t worry about the ones that are really tangled.
- Get some cheap conditioner. I use Suave or V05 Moisture Milk. Wet the hair and add a generous amount of conditioner. I usually do this in the shower so I use the max amount of water and ensure that each section stays completely wet as I am detangling.
- Take a good size chunk. About 10-15 twists. Add more conditioner and take a DENMAN Brush and begin to brush out the twists. Start from the bottom and work the brush up to the top. A good amount of hair will be lost, but that is ok. Your hair has not been able to shed because it has been twisted for weeks. Shed hair is expected.
- Braid the section once complete and move on doing the same thing until the whole head is done.
- Deep condition the hair when complete.
What Are Protective Hair Styles?
Protective styles are styles that keep your ends shielded from the various weather elements (wind, rain, snow, sun, etc.). These styles require no direct heat and no additional manipulation of the hair outside of the original styling. If done correctly, protective styling can to help retain moisture, prevent split ends and breakage, and cause less stress to the hair from constant combing, brushing, and styling. These styles are particularly useful for people with shoulder length hair. Once the hair is shoulder length, the ends of the hair tend to brush against clothing which causes a great deal of breakage.
There are many benefits to wearing protective styles. One major benefit is healthier, longer hair. Hair is healthier and can grow longer due to the fact that the hair is protected and not manipulated daily. Another benefit is the ability to spend less time on the hair on a daily basis. Protective styles usually require one styling day and the styles usually last anywhere from 1 to 4 weeks. True protective styles can also result in a reduction of acne that often results from hair and hair products coming in contact with the face. Lastly, some people just enjoy the look and the variety of protective styling options.
True protective styles keep the ends completely hidden. Examples of these styling options include:
• Buns
• Weaves
• Wigs
• Braid Extensions
• Phony Ponies
• Tucked styles
• Bantu Knots
Some consider low manipulation styles protective as well. While these are not truly protective styles because the ends are often exposed, they do require no direct heat and little to no manipulation which results in healthier hair and greater hair retention. These styling options include:
• Twists
• Twist outs, Braid outs, Bantu Knot outs
• Braids
• Coils
• Shrunken Fro
• Rollersets
• Pinned Up Styles
It is important to remember that even protective styles can cause damage if not done correctly. It is vital to be very careful whenever handling your hair, even if you are only handling it every so often. Never pull the hair and pay close attention when detangling. Many protective styles, such as twists will require extensive detangling when it’s time to remove them.
Also, while buns are considered the ultimate protective style, there are some things to take into consideration when choosing this style. First, consider the length of your hair. If your hair is a length that the ponytail holder will sit on the ends of your hair, buns may not be the best style until the hair grows out more. Secondly, hair needs a break even when in a bun. Switch up the style every so often. At least, switch the location of the bun. Breakage can result if the bun is worn in the same location every time.
Protective styles are fantastic styling options and promote healthier, longer hair. They look great, are easy to create, and give us a break from daily hair styling.


